The Swift Code之UINavigationController
Navigation是我们常用的组件,这个组件来导航,我们页面所在的位置.那这节课,我们就学学UINavigationController的使用.
我们先来创建一个UINavigationController的子类,等会使用的导航栏.
//
//  RootNavigationBar.swift
//  study.navigationbar
//
//  Created by Tonway on 15/7/5.
//  Copyright (c) 2015年 org.tonway. All rights reserved.
//

import UIKit

class RootNavigationBar: UINavigationController {

    /*
    // Only override drawRect: if you perform custom drawing.
    // An empty implementation adversely affects performance during animation.
    override func drawRect(rect: CGRect) {
        // Drawing code
    }
    */

}
设置应用程序的rootViewController为 RootNavigationBar的实例,且设置navbar的viewController为ViewController的实例.
func application(application: UIApplication, didFinishLaunchingWithOptions launchOptions: [NSObject: AnyObject]?) -> Bool {
        // Override point for customization after application launch.

        window = UIWindow(frame: UIScreen.mainScreen().bounds, 0, 0);
        let rootnav = RootNavigationBar(, 0, 0);
        window?.rootViewController = rootnav;

        //
        let root = ViewController(, 0, 0);
        rootnav.viewControllers = [root];

        return true
}
然后,我们来创建第一个面板,创建ViewController类,该类中,设置了navbar的标题,以及在面板中加入了一个UIButton,且给这个按钮加入了点击事件,该事件主要是跳转到第二个面板.而跳转方式是,通过navigationController的push方式跳转.
//
//  ViewController.swift
//  study.navigationbar
//
//  Created by Tonway on 15/7/5.
//  Copyright (c) 2015年 org.tonway. All rights reserved.
//

import UIKit

class ViewController: UIViewController {

    override func viewDidLoad() {
        super.viewDidLoad()
        self.view.backgroundColor = UIColor.grayColor(, 0, 0);
        self.navigationItem.title = "导航栏例子";


        //加入一个按钮

        let btn = UIButton(frame: CGRect(x: 0, y: 80, width: 300, height: 35), 0, 0);
        btn.addTarget(self, action: Selector("second"), forControlEvents: UIControlEvents.TouchUpInside, 0, 0);
        btn.setTitle("我要去第二个面板", forState: UIControlState.Normal, 0, 0);
        btn.backgroundColor = UIColor.greenColor(, 0, 0);
        self.view.addSubview(btn)
        // Do any additional setup after loading the view, typically from a nib.
    }

    override func didReceiveMemoryWarning() {
        super.didReceiveMemoryWarning()
        // Dispose of any resources that can be recreated.
    }

    func second(){
        let secondview = SecondViewController(, 0, 0);
        self.navigationController?.pushViewController(secondview, animated: true, 0, 0);
    }

}
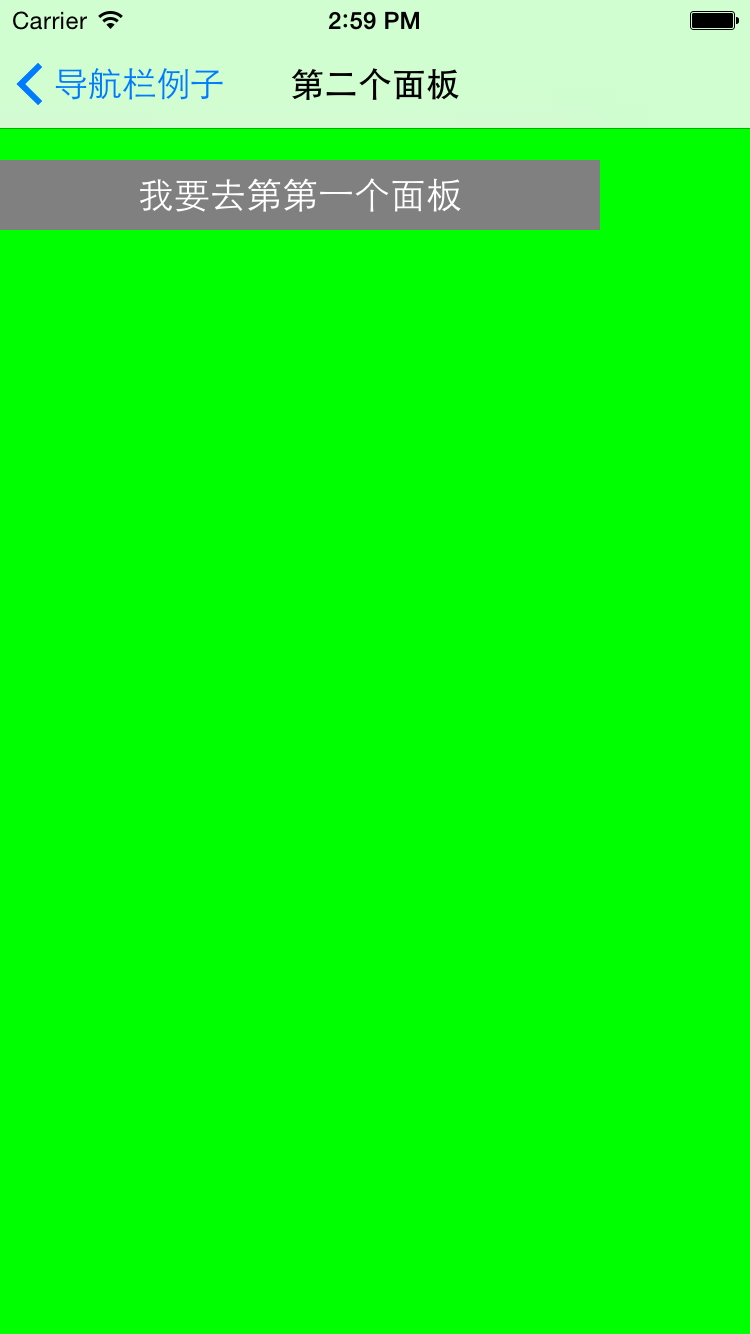
接着,我们创建第二个面板SecondViewController,同样这个面板设置了导航栏标题,加入一个按钮,给按钮添加了一个跳转事件,而事件的跳转是通过pop的方式,跳转到第一个面板.
//
//  SecondViewController.swift
//  study.navigationbar
//
//  Created by Tonway on 15/7/5.
//  Copyright (c) 2015年 org.tonway. All rights reserved.
//

import UIKit

class SecondViewController: UIViewController {

    override func viewDidLoad() {
        super.viewDidLoad()

        self.view.backgroundColor = UIColor.greenColor(, 0, 0);
        self.navigationItem.title = "第二个面板"
        // Do any additional setup after loading the view.

        let btn = UIButton(frame: CGRect(x: 0, y: 80, width: 300, height: 35), 0, 0);
        btn.addTarget(self, action: Selector("first"), forControlEvents: UIControlEvents.TouchUpInside, 0, 0);
        btn.setTitle("我要去第第一个面板", forState: UIControlState.Normal, 0, 0);
        btn.backgroundColor = UIColor.grayColor(, 0, 0);
        self.view.addSubview(btn)

    }

    override func didReceiveMemoryWarning() {
        super.didReceiveMemoryWarning()
        // Dispose of any resources that can be recreated.
    }

    func first(){
        self.navigationController?.popViewControllerAnimated(true, 0, 0);
    }


    /*
    // MARK: - Navigation

    // In a storyboard-based application, you will often want to do a little preparation before navigation
    override func prepareForSegue(segue: UIStoryboardSegue, sender: AnyObject?) {
        // Get the new view controller using segue.destinationViewController.
        // Pass the selected object to the new view controller.
    }
    */

}
到这里,我们不难看出navigation的加入页面和跳出页面是一种结构式方法,也是我们数据结构中的后进先出的结构.UINavigationController还有一些属性,比如加入在导航栏中加入更多的按钮,或者自定义左右按钮等等的相关操作.好,我们这里先学会使用导航栏的操作.
我们运行代码,效果如下:
