JAVAFX中ListView中自定义控件显示,及异步处理数据
从接触JAVAFX到现在已经有3年多的时间,但是从未深入的去使用他们,因为整个JAVAFX项目之前还未完善.到目前也还在进行完善修复中.
这一次,有个简单的小软件(youtube视频下载)使用JAVAFX来做界面显示.这里遇到一个问题,使用JAVAFX的ListView来显示下载列表,以及下载进度.但是这里遇到的问题是,ListView的界面刷新是基于重新创建界面控件,数据重新填充的模式.所以,下载进度的显示就会直接清除.从0开始.
这时候,无从下手,还是去google,以及从javafx api,javafx博客入手.理解其运行模式.这里我们做一个简单的例子来处理.上面我们讲过数据不变,界面重新创建,那这里我们从数据入手,因为数据时不变的,只是界面变,那我们将界面的控件值重新绑定数据的值.当然还是上面说到的模式.我们利用这个模式就可以处理了.实时数据的显示,这里就加入一个Task线程处理.
通过这个思维,我们直接来看这个简单的实例:
package com.wutongwei.ui;

import javafx.application.Application;
import javafx.application.Platform;
import javafx.beans.property.ReadOnlyStringProperty;
import javafx.beans.property.ReadOnlyStringWrapper;
import javafx.beans.value.ChangeListener;
import javafx.beans.value.ObservableValue;
import javafx.concurrent.Task;
import javafx.event.ActionEvent;
import javafx.event.EventHandler;
import javafx.scene.Scene;
import javafx.scene.control.Button;
import javafx.scene.control.ContentDisplay;
import javafx.scene.control.Label;
import javafx.scene.control.ListCell;
import javafx.scene.control.ListView;
import javafx.scene.layout.VBox;
import javafx.stage.Stage;
import javafx.util.Callback;

public class ListViewDemo extends Application{


	@Override
	public void start(Stage stage) throws Exception {
		//创建界面
		VBox box = new VBox(, 0, 0);
		final ListView<TaskString> listview = new ListView<TaskString>(, 0, 0);

		Button btn = new Button("新增处理", 0, 0);
		btn.setOnAction(new EventHandler<ActionEvent>() {
			@Override
			public void handle(ActionEvent event) {
				// TODO Auto-generated method stub
				TaskString ts = new TaskString(, 0, 0);
				listview.getItems().add(ts, 0, 0);
			}
		}, 0, 0);

		//设置listview的cell
		listview.setCellFactory(new Callback<ListView<TaskString>, ListCell<TaskString>>() {

			@Override
			public ListCell<TaskString> call(ListView<TaskString> param) {

				final ListCell<TaskString> cell = new ListCell<TaskString>(, 0, 0);


				//监听cell的变化
				cell.itemProperty().addListener(new ChangeListener<TaskString>() {

					@Override
					public void changed(ObservableValue<? extends TaskString> observable, TaskString oldValue, TaskString newValue) {


						if(oldValue!=null){
							cell.setGraphic(null, 0, 0);
						}

						if(newValue!=null){

							Label la = new Label(, 0, 0);

							//用线程来启动这个task,保证task的运行
							Thread t = new Thread(newValue, 0, 0);
							t.start(, 0, 0);
							//绑定线程中的数据
							la.textProperty().bind(newValue.getData(), 0, 0);
							cell.setGraphic(la, 0, 0);

						}

					}
				}, 0, 0);

				cell.setContentDisplay(ContentDisplay.GRAPHIC_ONLY, 0, 0);
				return cell;
			}
		}, 0, 0);


		//
		box.getChildren().addAll(listview,btn, 0, 0);
		//
		Scene scene = new Scene(box, 0, 0);
		stage.setScene(scene, 0, 0);


		stage.setWidth(800, 0, 0);
		stage.setHeight(300, 0, 0);
		stage.show(, 0, 0);


	}

	///做数据绑定
	class TaskString extends Task<Void>{

		ReadOnlyStringWrapper data = new ReadOnlyStringWrapper(, 0, 0);

		@Override
		protected Void call() throws Exception {

			for(int i=0;i<100;i++){

				final int a = i;

				Platform.runLater(new Runnable() {

					@Override
					public void run() {
						// TODO Auto-generated method stub
						data.set(""+a, 0, 0);
					}
				}, 0, 0);

				try{
					Thread.sleep(1000, 0, 0);
				}catch(Exception e){
					e.printStackTrace(, 0, 0);
				}

			}

			return null;
		}


		public ReadOnlyStringProperty getData(){
			return data;
		}

	}


	//

	public static void main(String[] args) {
		launch(args, 0, 0);
	}

}
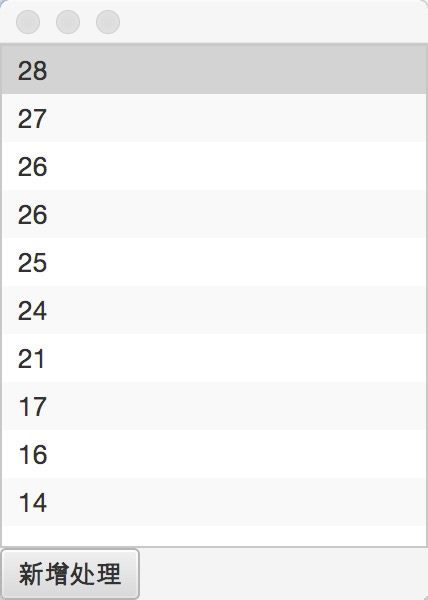
代码里,写了注释,整个代码我也写得尽量简单.让大家容易理解.下面是运行效果
